Forward
Franklin.jl is a simple, customisable static site generator oriented towards technical blogging and light, fast-loading pages.
At first, I want to learning Julia with a small open source project, smaller and better. Then I search on github with topic#julia, and I find this tool. As I learned about it on its site, I think I can use this for my massively personal site(maybe it is beautiful, but too complex), and learning Julia when rebuilding my site.
Therefore, I write this tutorial as my beginning.
Last but not least, Franklin.jl has many features:
-
Augmented markdown allowing definition of LaTeX-like commands,
-
Easy inclusion of user-defined div-blocks,
-
Maths rendered via KaTeX, code via highlight.js both can be pre-rendered,
-
Can live-evaluate Julia code blocks,
-
Live preview of modifications,
-
Simple optimisation step to compress and pre-render the website,
-
Simple publication step to deploy the website,
-
Straightforward integration with Literate.jl.
Setup Environment
- Download Julia from official site for your OS.
- Install it.
- Open julia REPL.
- Then excute
using Pkg; Pkg.add(Franklin)
Start building
- New a site with the following scripts:
julia> using Franklin
julia> newsite("mySite", template="pure-sm")
✓ Website folder generated at "mySite" (now the current directory).
→ Use serve() from Franklin to see the website in your browser.
Once you excuted the command above, this Julia REPL workspace will be in your site folder.
- Start local server for debug:
julia> serve()
→ Initial full pass...
→ Starting the server...
✓ LiveServer listening on http://localhost:8000/ ...
  (use CTRL+C to shut down)
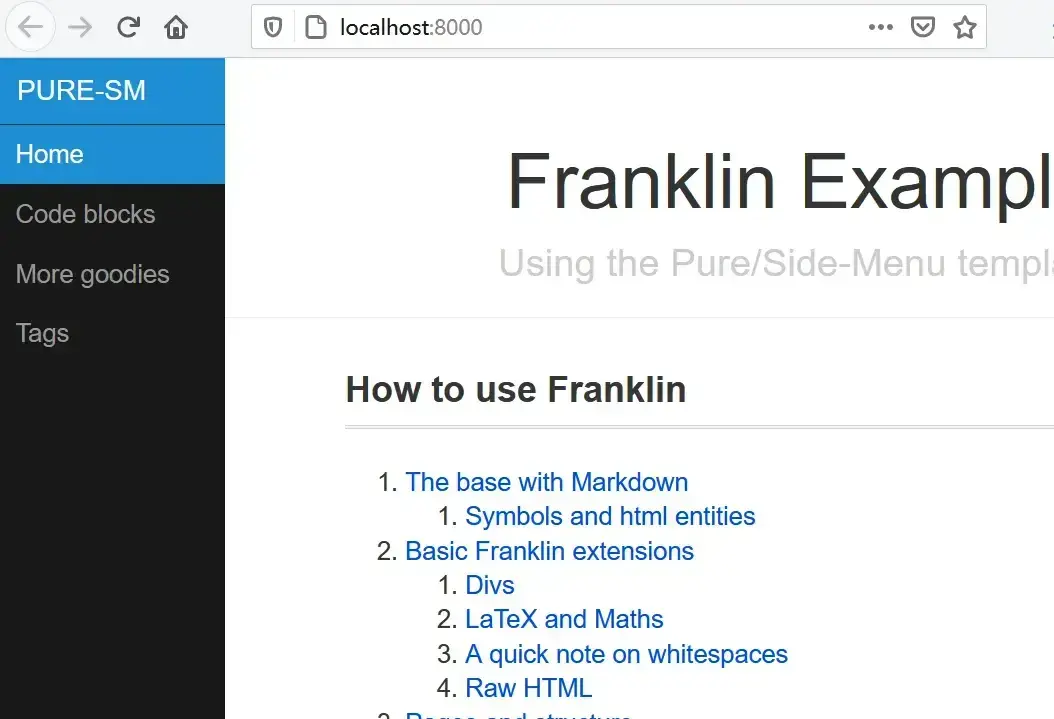
you can get this page in your browser:

note: this mySite folder will be created in your current directory. You can check your current directory withpwd().
Site Structure
Page structure
your mySite folder structure like this:
├─.github
│  └─workflows
├─_assets
│  └─scripts
│      └─output
├─_css
├─_layout
├─_libs
│  ├─highlight
│  ├─katex
│  │  └─fonts
│  └─pure
└─__site
    ├─assets
    │  ├─menu1
    │  │  ├─code
    │  │  │  └─output
    │  │  └─output
    │  └─scripts
    │      └─output
    ├─css
    ├─layout
    ├─libs
    │  ├─highlight
    │  ├─katex
    │  │  └─fonts
    │  └─pure
    ├─menu1
    ├─menu2
    ├─menu3
    └─tag
        ├─code
        ├─image
        └─syntax
The .github folder is generated for Github Actions, you can config some fields for your customization.Fox example, you can change trigger branch from dev to your workspace branch like master.
name: Build and Deploy
on:
  push:
    branches:
-      - dev
+      - master
Then you should change another BRANCH(I named it as site branch) field here:
    - name: Build and Deploy
      uses: JamesIves/github-pages-deploy-action@releases/v3
      with:
        GITHUB_TOKEN: ${{ secrets.GITHUB_TOKEN }}
-       BRANCH: master
+       BRANCH: dev
        FOLDER: __site
NOTE: you must keep the site branch different from the workspace branch(in the case it’s master), because you site files will be generated on dev branch
If you use config above, your master branch is your workspace branch and your dev branch is your Github Pages site branch.
Deploying on GitHub
local config
-
Create a personal repo on github, named
username.github.io, or you can name it whatever you want to if you have a domain. -
Open local folder you created with Franklin before with bash or any other shell.
-
Follow these steps below to config your repo:
i)git remote add origin URL_TO_YOUR_REPO
ii)git add . && git commit -m "initial files"
iii)git push -u origin master
github config
-
Open
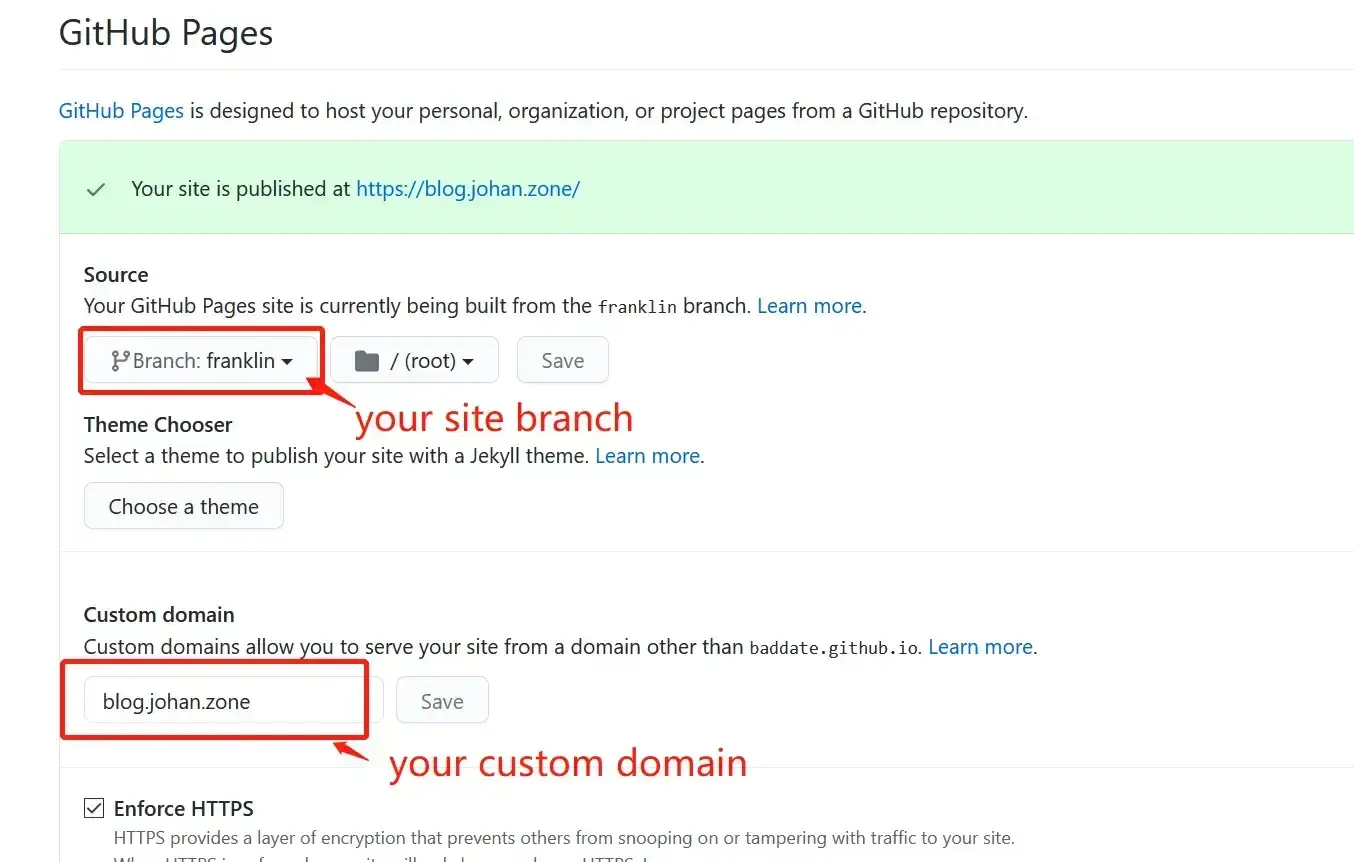
Settingson your repo page, and scrolling down until you findGitHub Pagesoption. -
Config it as below:

note: you must make the branch __same__ as the **site branch** in the `deploy.yml`
DONE!
You can find some examples of websites using Franklin.jl from Franklin.jl.
By the way, I following this blog site as templates and customizing it. It is a very simple and wonderful site.
Please email me if there are any errors.
REFERENCE
https://github.com/abhishalya/abhishalya.github.io
Sooner or later, everything ends.